Building a four-node Raspberry Pi 5 cluster
I’ve been doing a lot of work with Kubernetes recently.
My day job is as a Site Reliability Engineer, and I spend my spare time as a Research Consultant, primarily in Bioinformatics and Computational Genomics. Both of these disciplines require an understanding of distributed and high-performance computing. Kubernetes is particularly relevant to scaling various workloads.
As part of my learning and development, I decided to build a home lab that would allow me to test various tools and concepts in a safe environment without requiring me to regularly pay for a Google Kubernetes Engine cluster in Google Cloud Platform (I know there are other Cloud providers, but I prefer Google).
I had been trying to work using a KinD cluster on my old Raspberry Pi 4, as well as on my MacBook Pro, but there are limitations to running in Docker, and to running Docker on macOS (namely, macOS doesn’t natively support Linux containerization features and so must run within a VM). I could have invested in a Linux laptop, such as the Dell XPS 16, but I am an Apple fanboy and use their whole ecosystem. The available resources on the Pi 4 also weren’t enough.
I had been running a four-node (one control plane and three workers) cluster in KinD on my laptop, but the Raspberry Pi 4 couldn’t handle it. I knew I wanted to switch to a four-node physical cluster. I wanted something that would make the most efficient use of space and power, so I decided to go with the latest Raspberry Pi 5 with 16 GB RAM.
I jumped on Amazon and ordered the following:
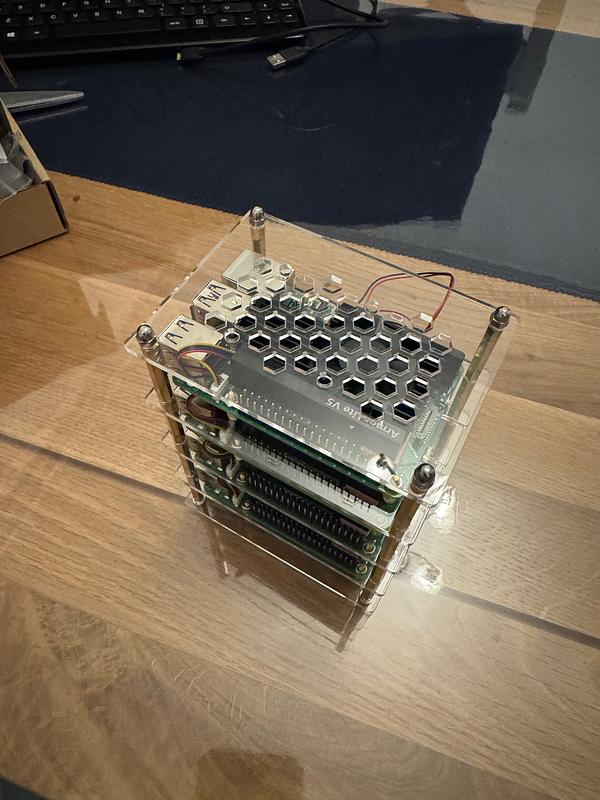
- 1 x GeeekPi 4 Layers Acrylic Case with Armor Lite V5 Active Cooler Heatsink
- 4 x Raspberry Pi 5 (16GB)
- 4 x 512GB Samsung Evo Plus MicroSD
- 4 x Anker 100W USB C Charger
- 5 x Amazon Basics RJ45 Cat 7 High-Speed Gigabit Ethernet Patch Internet Cable
- 4 x Amazon Basics CAT 6 Gigabit Ethernet Cable
- 1 x TP-Link TL-SG605E 5 Port Gigabit Smart Switch
- 1 x 1050VA APC UPS Battery Backup with AVR
- 1 x 200PCS Cable Management Kit
I ordered two lots of ethernet cables as I wasn’t sure if the 0.3 metre cables would be long enough.
The 16GB Pis were out of stock on Amazon (and elsewhere, e.g. The Pi Hut and Pimoroni) and would have taken a few weeks to arrive. I had set up a notification for when things came into stock again on both Pimoroni and The Pi Hut, and I received an email to say they were back in stock a few days later. So, I decided to cancel the order for the Pis on Amazon and order things from The Pi Hut instead (purely because their email hit my inbox before Pimoroni’s).
I ordered the following components from The Pi Hut:
Everything arrived the next day from Amazon, but I had to wait a little while for the Pis to arrive. Once everything arrived, I was ready to build.


I brought all the items upstairs from my office in the basement and set things up, ready to go. I had my monitor, a keyboard and a wireless mouse, plus a Micro HDMI cable just in case I needed to connect to the Pis directly. I also had some sustenance to keep me going through what I expected to be a long evening.
I started by unboxing everything and getting it all set out in batches for each of the Pis.
I decided to flash the micro SD cards first. I put them in their adaptors and inserted each in turn into my MacBook Pro’s SD card slot.
I chose to use Ubuntu as the host operating system. I went to the Ubuntu Raspberry Pi website and downloaded the Raspberry Pi Imager. I then downloaded (and extracted) the latest Ubuntu Server 24.04.2 LTS release image for the Raspberry Pi in XZ format. I installed the Raspberry Pi Imager software on my MacBook Pro. I then loaded the software and followed the process for each of the Micro SD cards.
I clicked on “Raspberry Pi 5” for the device, clicked on “Use custom” for the operating system (selecting the ubuntu-24.04.2-preinstalled-server-arm64+raspi.img file) and under storage, I selected the “Apple SDX Reader Media” option. I then clicked next. A window popped up asking me if I wanted to configure some settings. I clicked edit settings to apply settings to the image.
In edit settings under the general tab, I set my hostname to eniac-node1 through eniac-node4 (ENIAC being the name of the first programmable, electronic, general-purpose digital computer, completed in 1945), I set my username and password to the ones I wanted to use on the system, I set the wireless LAN to that of my router, and I left the locale as Europe/London for the timezone and gb for the keyboard layout. Under the services tab, I selected “Enable SSH” and entered my RSA public key. Under the options tab, I left everything selected. I then clicked save and selected yes to use the OS customizations. I clicked yes to continue writing to the Micro SD card.
I repeated this for all four of the Micro SD cards, using different hostnames for each.
Once this was complete, I inserted the Micro SD cards into the slots on the underside of each of the Pis.
I was going to connect the Pis up to the monitor and do some further configuration, but I realised that given the settings I had just applied, I wouldn’t need to do that, as they would have network connectivity straight from boot over the wireless interface with SSH enabled. I decided to set them aside and start building the case.
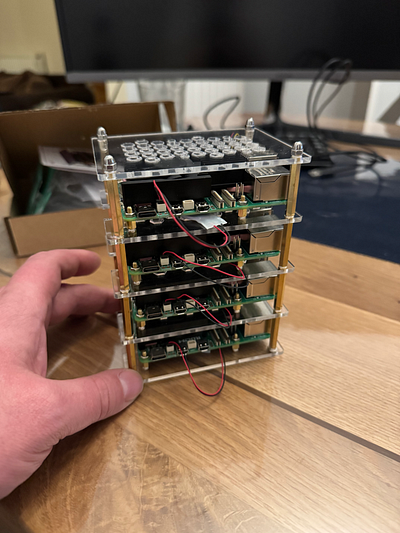
The case came with everything I needed, including the perspex layers, various connection screws, the thermal pads, and heat sinks/fans. I enlisted the help of my 13-year-old son to get it built, whilst trying to pass on some of my knowledge in the process (he has said he would like to follow in my footsteps in the future — under no pressure from me). My daughter wasn’t as interested in my “Blueberry Raspberries”, as she put it.
We started by putting the thermal pads in place on the chips on the mainboard of each of the Pis and then fitted the Armour Lite V5 Heatsinks into place. This was a little difficult with the smaller thermal pads, but it went well overall. There were plenty of thermal pads left.
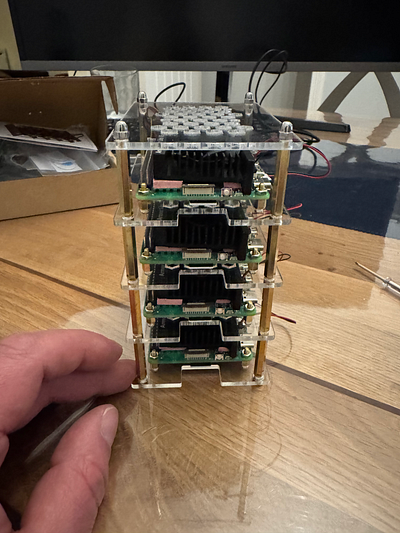
It took a good while to build the whole case, and it was quite fiddly in places (especially putting the bolts onto the screws that hold each of the Pis in place), but the result was great.

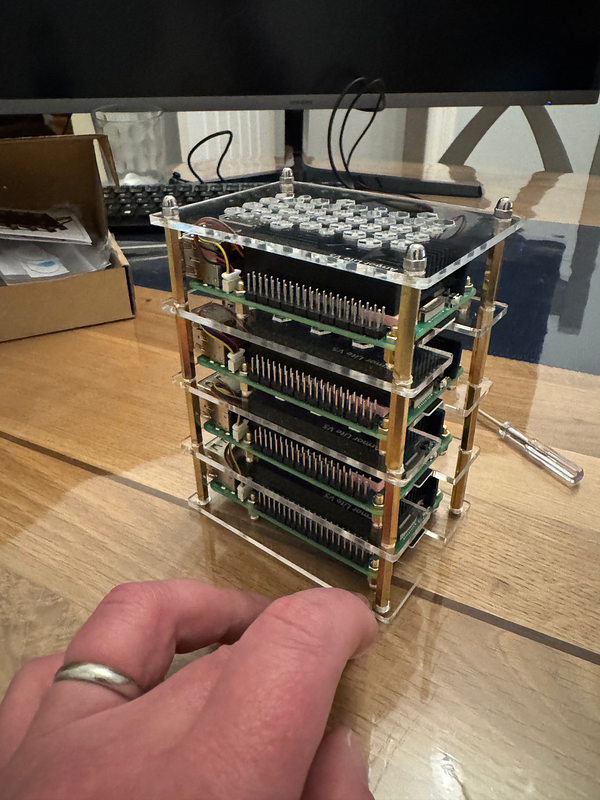
I also fitted the RTC batteries, however, I did this after I had put the case together, and in hindsight, I should have done it as I was going along, as it was difficult to connect them up to the mainboard with the limited space in between each layer.
The recharge circuit for the RTC batteries on the Pis is disabled by default, so that’s something I’ll need to configure later.
The case is really good quality and allows a lot of air to move around the Pis, which will help with keeping them cool, though there is limited room for any expansions. I was hoping to get a Raspberry Pi AI Kit in the future, but I will have to check the available space and the impact on cooling.
The next step was to connect them up to the switch. I got the 0.3 metre Cat 7 ethernet cables out and made sure they were long enough to reach each of the Pis. They were the perfect length. This meant I could return the longer 0.9 metre Cat 6 ethernet cables I had also bought to Amazon. They were quite stiff, though, so I wasn’t able to put the case on top of the switch as I had hoped. I also couldn’t put the case on its side, as the thermal pads weren’t very sticky, and the heatsinks/fans kept coming loose. I had to stick with the case standing next to the switch.

After that, I connected the battery to the UPS and took the Pis downstairs to their home in the basement.

Once I got downstairs, I plugged the switch into my router and connected the Anker chargers up to the Pis one by one. It was satisfying to see the power lights come on on the Pis.
I went upstairs to my laptop and was able to ascertain the IPs of each Pi by checking my router’s client list, however, the ethernet ports didn’t show up. Once I had the IPs for all four Pis, I edited my SSH config on my laptop to include the name of each of the Pis as follows:
Host eniac-node1
  Hostname 192.168.50.129
  Port 22
  User gawbul
  IdentityFile /Users/gawbul/.ssh/id_rsa

Host eniac-node2
  Hostname 192.168.50.31
  Port 22
  User gawbul
  IdentityFile /Users/gawbul/.ssh/id_rsa

Host eniac-node3
  Hostname 192.168.50.167
  Port 22
  User gawbul
  IdentityFile /Users/gawbul/.ssh/id_rsa

Host eniac-node4
  Hostname 192.168.50.111
  Port 22
  User gawbul
  IdentityFile /Users/gawbul/.ssh/id_rsa
I connected to eniac-node1 over SSH using ssh eniac-node1 and checked the status of the ethernet interface using the following commands:
sudo su -
ip link show
ip address show eth0
ethtool eth0
lshw -class network
This showed that the link state was registered as DOWN, hence the IPs not showing up on my router.
I created a netplan configuration file at /etc/netplan/99-ethernet-config.yaml with the following contents:
network:
  version: 2
  renderer: networkd
  ethernets:
    eth0:
      dhcp4: true
I chose to keep the configuration to DHCP initially. Later, I’ll update it to a static IP.
I then ran the following commands:
sudo chmod 600 /etc/netplan/99-ethernet-config.yaml
sudo netplan apply
This caused the SSH session to hang, and I had to quit and restart the terminal session.
I SSH’d back into eniac-node1 and rebooted using sudo reboot.
After rebooting the Pi came back up fine, and the client IP for the ethernet interface came up on my router home page.
I decided to turn off the WiFi on all the nodes so I edited the /etc/netplan/50-cloud-init.yaml file that was automatically created by the Raspberry Pi Imager to add activation-mode: "off"; and I then ran sudo netplan apply.
Running ip link show wlan0 showed that the state was now down.
One thing I noticed while trying out various commands on the Pi was that my terminal wasn’t supported, so I had to copy the terminfo to each of the nodes. I use Ghostty, and this is a known issue at present.
I updated the terminfo as follows:
infocmp -x | ssh eniac-node1 -- tic -x -
infocmp -x | ssh eniac-node2 -- tic -x -
infocmp -x | ssh eniac-node3 -- tic -x -
infocmp -x | ssh eniac-node4 -- tic -x -
I also noticed the following warning when connecting to each of the Pis:
This power supply is not capable of supplying 5A; power to peripherals
will be restricted

See man:pemmican-cli(1) for information on suppressing this warning,
or https://rptl.io/rpi5-power-supply-info for more information on the
Raspberry Pi 5 power supply
This was confusing, as the specs for the power supplies stated they were capable of up to 5A at 100W.
I did some reading here and tried adding the following line to the end of /boot/firmware/config.txt followed by a reboot, but it didn’t make a difference, so I reverted.
usb_max_current_enable=1
I decided to bite the bullet and initiate a return of the Anker power supplies and order the official Raspberry Pi 27W USB-C Power Supply in black instead. This saved me some money and seems to be the recommended power supply for Pis.
I then repeated the above steps to enable the ethernet interface and disable the Wi-Fi on all the nodes, rebooting each in turn.
All the IPs showed up on reboot, and the Pis were ready.
I updated my local ~/.ssh/config as relevant.


This was where the manual configuration ended.
You can view my video on YouTube detailing the build process from start to finish.

For the next stage, I created a repository on GitHub called gawbul-homelab, which I would use moving forward to house the configuration and set up scripts for my cluster.
I installed mise and created a simple mise.toml file to begin with, with the following task:
[tasks.ssh-command-run]
description = "Run a command over SSH on the remote nodes"
run = """
for node in $HOMELAB_NODES; do
  ssh $node {{arg(name="command")}}
done
"""
This made use of the following environment configuration:
[env]
HOMELAB_NODES = "eniac-node1 eniac-node2 eniac-node3 eniac-node4"
This allowed me to run the following command across all nodes in sequence to update to the latest version of all packages:
mise run ssh-command-run 'sudo apt update && sudo apt -y dist-upgrade'
Using the mise task was great for running commands over SSH across all the Pis, but it wasn’t what I wanted to do from a best practice perspective, as it meant a lot of manual setup. I wanted to create something I could use to set up and manage the software and configuration on all of the Pis, which is where a configuration management utility comes in.
I decided on Ansible as the configuration management tool for my setup, not least because I am more versed in Python. I have used Chef and SaltStack in the past and am aware of Puppet, but I thought Ansible would suit me best here.
I created a list of tools I wanted to install as a base in my mise file, as follows:
[tools]
ansible = "latest"
container-structure-test = "latest"
cosign = "latest"
flux2 = "latest"
go = "latest"
helm = "latest"
hk = "latest"
jq = "latest"
k9s = "latest"
kubectl = "latest"
kubectx = "latest"
pkl = "latest"
python = "latest"
shellcheck = "latest"
skaffold = "latest"
slsa-verifier = "latest"
usage = "latest"
yq = "latest"
I then enabled experimental mode in mise:
cat <<EOF | tee -a ~/.config/mise/config.toml
[settings]
experimental = true
EOF
I ran the following to setup and install all the tools:
touch mise.lock
mise install
Creating the lock file allows me to maintain a list of versions and checksums for each of the tools in my mise.toml file.
I then created a playbook to set up and configure all the nodes. This contained a common configuration to install a common state across all nodes and then plays specific to the control plane (eniac-node1) and worker nodes (eniac-node1 through eniac-node4).
I created the following mise task to run the playbook against all hosts:
[tasks.ansible-playbook-run]
description = "Run the Ansible playbooks using the hosts file"
run = """
ansible-playbook -i hosts site.yaml
"""
I then iterated on the code until things were set up at a base level on each of the nodes using the common role, running the Ansible plays with the following:
mise run ansible-playbook-run
Once the common role was set up, I then moved to configure the Kubernetes nodes using the following guide (using the Without a package manager option). I also used Kelsey Hightower’s Kubernetes the Hard Way as prerequisite knowledge and to tweak some things alongside.
For containerdI needed the following information as well as this guide to help configure the systemd cgroup driver.
The first task, however, was to set up the SSL certificate configuration for the nodes using the following CA configuration file:
[req]
distinguished_name = req_distinguished_name
prompt             = no
x509_extensions    = ca_x509_extensions

[ca_x509_extensions]
basicConstraints = CA:TRUE
keyUsage         = cRLSign, keyCertSign

[req_distinguished_name]
C   = UK
ST  = North Yorkshire
L   = York
CN  = CA

[admin]
distinguished_name = admin_distinguished_name
prompt             = no
req_extensions     = default_req_extensions

[admin_distinguished_name]
CN = admin
O  = system:masters

# Service Accounts
#
# The Kubernetes Controller Manager leverages a key pair to generate
# and sign service account tokens as described in the
# [managing service accounts](https://kubernetes.io/docs/admin/service-accounts-admin/)
# documentation.

[service-accounts]
distinguished_name = service-accounts_distinguished_name
prompt             = no
req_extensions     = default_req_extensions

[service-accounts_distinguished_name]
CN = service-accounts

# Worker Nodes
#
# Kubernetes uses a [special-purpose authorization mode](https://kubernetes.io/docs/admin/authorization/node/)
# called Node Authorizer, that specifically authorizes API requests made
# by [Kubelets](https://kubernetes.io/docs/concepts/overview/components/#kubelet).
# In order to be authorized by the Node Authorizer, Kubelets must use a credential
# that identifies them as being in the `system:nodes` group, with a username
# of `system:node:<nodeName>`.

[eniac-node1]
distinguished_name = eniac-node1_distinguished_name
prompt             = no
req_extensions     = eniac-node1_req_extensions

[eniac-node1_req_extensions]
basicConstraints     = CA:FALSE
extendedKeyUsage     = clientAuth, serverAuth
keyUsage             = critical, digitalSignature, keyEncipherment
nsCertType           = client
nsComment            = "ENIAC-Node1 Certificate"
subjectAltName       = @eniac-node1_alt_names
subjectKeyIdentifier = hash

[eniac-node1_alt_names]
IP.0  = 127.0.0.1
IP.1  = 192.168.50.4
DNS.0 = eniac-node1

[eniac-node1_distinguished_name]
CN = system:node:eniac-node1
O  = system:nodes
C  = UK
ST = North Yorkshire
L  = York

[eniac-node2]
distinguished_name = eniac-node2_distinguished_name
prompt             = no
req_extensions     = eniac-node2_req_extensions

[eniac-node2_req_extensions]
basicConstraints     = CA:FALSE
extendedKeyUsage     = clientAuth, serverAuth
keyUsage             = critical, digitalSignature, keyEncipherment
nsCertType           = client
nsComment            = "ENIAC-Node2 Certificate"
subjectAltName       = @eniac-node2_alt_names
subjectKeyIdentifier = hash

[eniac-node2_alt_names]
IP.0  = 127.0.0.1
IP.1  = 192.168.50.5
DNS.0 = eniac-node2

[eniac-node2_distinguished_name]
CN = system:node:eniac-node2
O  = system:nodes
C  = UK
ST = North Yorkshire
L  = York

[eniac-node3]
distinguished_name = eniac-node3_distinguished_name
prompt             = no
req_extensions     = eniac-node3_req_extensions

[eniac-node3_req_extensions]
basicConstraints     = CA:FALSE
extendedKeyUsage     = clientAuth, serverAuth
keyUsage             = critical, digitalSignature, keyEncipherment
nsCertType           = client
nsComment            = "ENIAC-Node3 Certificate"
subjectAltName       = @eniac-node3_alt_names
subjectKeyIdentifier = hash

[eniac-node3_alt_names]
IP.0  = 127.0.0.1
IP.1  = 192.168.50.6
DNS.0 = eniac-node3

[eniac-node3_distinguished_name]
CN = system:node:eniac-node3
O  = system:nodes
C  = UK
ST = North Yorkshire
L  = York

[eniac-node4]
distinguished_name = eniac-node4_distinguished_name
prompt             = no
req_extensions     = eniac-node4_req_extensions

[eniac-node4_req_extensions]
basicConstraints     = CA:FALSE
extendedKeyUsage     = clientAuth, serverAuth
keyUsage             = critical, digitalSignature, keyEncipherment
nsCertType           = client
nsComment            = "ENIAC-Node4 Certificate"
subjectAltName       = @eniac-node4_alt_names
subjectKeyIdentifier = hash

[eniac-node4_alt_names]
IP.0  = 127.0.0.1
IP.1  = 192.168.50.7
DNS.0 = eniac-node4

[eniac-node4_distinguished_name]
CN = system:node:eniac-node4
O  = system:nodes
C  = UK
ST = North Yorkshire
L  = York

# Kube Proxy
[kube-proxy]
distinguished_name = kube-proxy_distinguished_name
prompt             = no
req_extensions     = kube-proxy_req_extensions

[kube-proxy_req_extensions]
basicConstraints     = CA:FALSE
extendedKeyUsage     = clientAuth, serverAuth
keyUsage             = critical, digitalSignature, keyEncipherment
nsCertType           = client
nsComment            = "Kube Proxy Certificate"
subjectAltName       = @kube-proxy_alt_names
subjectKeyIdentifier = hash

[kube-proxy_alt_names]
IP.0  = 127.0.0.1
IP.1  = 192.168.50.4
IP.2  = 192.168.50.5
IP.3  = 192.168.50.6
IP.4  = 192.168.50.7
DNS.0 = kube-proxy

[kube-proxy_distinguished_name]
CN = system:kube-proxy
O  = system:node-proxier
C  = UK
ST = North Yorkshire
L  = York

# Front Proxy Client
[front-proxy-client]
distinguished_name = front-proxy-client_distinguished_name
prompt             = no
req_extensions     = front-proxy-client_req_extensions

[front-proxy-client_req_extensions]
basicConstraints     = CA:FALSE
extendedKeyUsage     = clientAuth, serverAuth
keyUsage             = critical, digitalSignature, keyEncipherment
nsCertType           = client
nsComment            = "Front Proxy Client Certificate"
subjectAltName       = @front-proxy-client_alt_names
subjectKeyIdentifier = hash

[front-proxy-client_alt_names]
IP.0  = 127.0.0.1
IP.1  = 192.168.50.4
DNS.0 = front-proxy-client

[front-proxy-client_distinguished_name]
CN = front-proxy-client
C  = UK
ST = North Yorkshire
L  = York

# Controller Manager
[kube-controller-manager]
distinguished_name = kube-controller-manager_distinguished_name
prompt             = no
req_extensions     = kube-controller-manager_req_extensions

[kube-controller-manager_req_extensions]
basicConstraints     = CA:FALSE
extendedKeyUsage     = clientAuth, serverAuth
keyUsage             = critical, digitalSignature, keyEncipherment
nsCertType           = client
nsComment            = "Kube Controller Manager Certificate"
subjectAltName       = @kube-controller-manager_alt_names
subjectKeyIdentifier = hash

[kube-controller-manager_alt_names]
IP.0  = 127.0.0.1
IP.1  = 192.168.50.4
DNS.0 = kube-controller-manager

[kube-controller-manager_distinguished_name]
CN = system:kube-controller-manager
O  = system:kube-controller-manager
C  = UK
ST = North Yorkshire
L  = York

# Scheduler
[kube-scheduler]
distinguished_name = kube-scheduler_distinguished_name
prompt             = no
req_extensions     = kube-scheduler_req_extensions

[kube-scheduler_req_extensions]
basicConstraints     = CA:FALSE
extendedKeyUsage     = clientAuth, serverAuth
keyUsage             = critical, digitalSignature, keyEncipherment
nsCertType           = client
nsComment            = "Kube Scheduler Certificate"
subjectAltName       = @kube-scheduler_alt_names
subjectKeyIdentifier = hash

[kube-scheduler_alt_names]
IP.0  = 127.0.0.1
IP.1  = 192.168.50.4
DNS.0 = kube-scheduler

[kube-scheduler_distinguished_name]
CN = system:kube-scheduler
O  = system:system:kube-scheduler
C  = UK
ST = North Yorkshire
L  = York

# API Server
#
# The Kubernetes API server is automatically assigned the `kubernetes`
# internal dns name, which will be linked to the first IP address (`10.32.0.1`)
# from the address range (`10.32.0.0/24`) reserved for internal cluster
# services.

[kube-api-server]
distinguished_name = kube-api-server_distinguished_name
prompt             = no
req_extensions     = kube-api-server_req_extensions

[kube-api-server_req_extensions]
basicConstraints     = CA:FALSE
extendedKeyUsage     = clientAuth, serverAuth
keyUsage             = critical, digitalSignature, keyEncipherment
nsCertType           = client
nsComment            = "Kube Scheduler Certificate"
subjectAltName       = @kube-api-server_alt_names
subjectKeyIdentifier = hash

[kube-api-server_alt_names]
IP.1  = 127.0.0.1
IP.1  = 192.168.50.4
IP.2  = 10.32.0.1
DNS.0 = kubernetes
DNS.1 = kubernetes.default
DNS.2 = kubernetes.default.svc
DNS.3 = kubernetes.default.svc.cluster
DNS.4 = kubernetes.svc.cluster.local
DNS.5 = server.kubernetes.local
DNS.6 = api-server.kubernetes.local
DNS.7 = eniac-node1.kubernetes.local
DNS.8 = eniac-node1

[kube-api-server_distinguished_name]
CN = kubernetes
C  = UK
ST = North Yorkshire
L  = York

[default_req_extensions]
basicConstraints     = CA:FALSE
extendedKeyUsage     = clientAuth
keyUsage             = critical, digitalSignature, keyEncipherment
nsCertType           = client
nsComment            = "Admin Client Certificate"
subjectKeyIdentifier = hash
I also created the following mise tasks to generate the CA certificate and client and server certificates:
[tasks.ssl-ca-certificate-generate]
description = "Generate the SSL CA certificate"
run = """
openssl genrsa -out certs/ca.key 4096

openssl req -x509 -new -sha512 -noenc \
  -key certs/ca.key -days 3653 \
  -config config/ca.conf \
  -out certs/ca.crt
"""

[tasks.ssl-certificates-generate]
description = "Generate the client and server SSL certificates"
run = """
for i in ${K8S_CERTIFICATES[*]}; do
  openssl genrsa -out "certs/${i}.key" 4096

  openssl req -new -key "certs/${i}.key" -sha256 \
    -config "config/ca.conf" -section ${i} \
    -out "certs/${i}.csr"

  openssl x509 -req -days 3653 -in "certs/${i}.csr" \
    -copy_extensions copyall \
    -sha256 -CA "certs/ca.crt" \
    -CAkey "certs/ca.key" \
    -CAcreateserial \
    -out "certs/${i}.crt"
done
"""
I made sure to add a certs entry to the .gitignore file to ensure I don’t commit these to version control.
I then generated the kubeconfig files with the following mise tasks:
[tasks.kubeconfig-kubelet-generate]
description = "Generate the kubelet kubeconfig files"
run = """
for node in ${K8S_WORKER_NODES[*]}; do
  kubectl config set-cluster ${K8S_CLUSTER_NAME} \
    --certificate-authority=certs/ca.crt \
    --embed-certs=true \
    --server=https://${K8S_CONTROL_PLANE_NODE}.kubernetes.local:6443 \
    --kubeconfig=kubeconfig/${node}.kubeconfig

  kubectl config set-credentials system:node:${node} \
    --client-certificate=certs/${node}.crt \
    --client-key=certs/${node}.key \
    --embed-certs=true \
    --kubeconfig=kubeconfig/${node}.kubeconfig

  kubectl config set-context default \
    --cluster=${K8S_CLUSTER_NAME} \
    --user=system:node:${node} \
    --kubeconfig=kubeconfig/${node}.kubeconfig

  kubectl config use-context default \
    --kubeconfig=kubeconfig/${node}.kubeconfig
done
"""

[tasks.kubeconfig-kube-proxy-generate]
description = "Generate the kube-proxy kubeconfig file"
run = """
kubectl config set-cluster ${K8S_CLUSTER_NAME} \
  --certificate-authority=certs/ca.crt \
  --embed-certs=true \
  --server=https://${K8S_CONTROL_PLANE_NODE}.kubernetes.local:6443 \
  --kubeconfig=kubeconfig/kube-proxy.kubeconfig

kubectl config set-credentials system:kube-proxy \
  --client-certificate=certs/kube-proxy.crt \
  --client-key=certs/kube-proxy.key \
  --embed-certs=true \
  --kubeconfig=kubeconfig/kube-proxy.kubeconfig

kubectl config set-context default \
  --cluster=${K8S_CLUSTER_NAME} \
  --user=system:kube-proxy \
  --kubeconfig=kubeconfig/kube-proxy.kubeconfig

kubectl config use-context default \
  --kubeconfig=kubeconfig/kube-proxy.kubeconfig
"""

[tasks.kubeconfig-kube-controller-manager-generate]
description = "Generate the kube-controller-manager kubeconfig file"
run = """
kubectl config set-cluster ${K8S_CLUSTER_NAME} \
  --certificate-authority=certs/ca.crt \
  --embed-certs=true \
  --server=https://${K8S_CONTROL_PLANE_NODE}.kubernetes.local:6443 \
  --kubeconfig=kubeconfig/kube-controller-manager.kubeconfig

kubectl config set-credentials system:kube-controller-manager \
  --client-certificate=certs/kube-controller-manager.crt \
  --client-key=certs/kube-controller-manager.key \
  --embed-certs=true \
  --kubeconfig=kubeconfig/kube-controller-manager.kubeconfig

kubectl config set-context default \
  --cluster=${K8S_CLUSTER_NAME} \
  --user=system:kube-controller-manager \
  --kubeconfig=kubeconfig/kube-controller-manager.kubeconfig

kubectl config use-context default \
  --kubeconfig=kubeconfig/kube-controller-manager.kubeconfig
"""

[tasks.kubeconfig-kube-scheduler-generate]
description = "Generate the kube-scheduler kubeconfig file"
run = """
kubectl config set-cluster ${K8S_CLUSTER_NAME} \
  --certificate-authority=certs/ca.crt \
  --embed-certs=true \
  --server=https://${K8S_CONTROL_PLANE_NODE}.kubernetes.local:6443 \
  --kubeconfig=kubeconfig/kube-scheduler.kubeconfig

kubectl config set-credentials system:kube-scheduler \
  --client-certificate=certs/kube-scheduler.crt \
  --client-key=certs/kube-scheduler.key \
  --embed-certs=true \
  --kubeconfig=kubeconfig/kube-scheduler.kubeconfig

kubectl config set-context default \
  --cluster=${K8S_CLUSTER_NAME} \
  --user=system:kube-scheduler \
  --kubeconfig=kubeconfig/kube-scheduler.kubeconfig

kubectl config use-context default \
  --kubeconfig=kubeconfig/kube-scheduler.kubeconfig
"""

[tasks.kubeconfig-admin-generate]
description = "Generate the admin kubeconfig file"
run = """
kubectl config set-cluster ${K8S_CLUSTER_NAME} \
  --certificate-authority=certs/ca.crt \
  --embed-certs=true \
  --server=https://${K8S_CONTROL_PLANE_NODE}.kubernetes.local:6443 \
  --kubeconfig=kubeconfig/admin.kubeconfig

kubectl config set-credentials admin \
  --client-certificate=certs/admin.crt \
  --client-key=certs/admin.key \
  --embed-certs=true \
  --kubeconfig=kubeconfig/admin.kubeconfig

kubectl config set-context default \
  --cluster=${K8S_CLUSTER_NAME} \
  --user=admin \
  --kubeconfig=kubeconfig/admin.kubeconfig

kubectl config use-context default \
  --kubeconfig=kubeconfig/admin.kubeconfig
"""

[tasks.kubeconfig-generate]
description = "Wrapper task to generate all kubeconfig files"
depends = [
  "kubeconfig-kubelet-generate",
  "kubeconfig-kube-proxy-generate",
  "kubeconfig-kube-controller-manager-generate",
  "kubeconfig-kube-scheduler-generate",
  "kubeconfig-admin-generate"
]
I generated all of these at once by running mise run kubeconfig-generate and again added the kubeconfig directory to the .gitignore to ensure the certificates weren’t added to version control.
To encrypt data at rest I next generated an EncryptionConfiguration file using the following mise task:
[tasks.encryption-config-generate]
description = "Generate the data encryption config"
run = """
export ENCRYPTION_KEY=$(head -c 32 /dev/urandom | base64)
envsubst < config/encryption-configuration.yaml | tee encryption-config.yaml
"""
Again, adding the resulting encryption-config.yaml file to .gitignore to avoid exposing the secret.
I decided to set the eth0 IPs as static before moving forward any further and so updated the 99-ethernet-config.yaml to a template for each of the nodes with the following format (with differing routes for each node) along with some configuration on my router:
network:
  version: 2
  renderer: networkd
  ethernets:
    eth0:
      dhcp4: false
      dhcp6: false
      addresses:
        - {{ item.value.ip_address }}/24
      routes:
        - to: default
          via: {{ router_gateway_ip }}
        - to: 10.32.0.0/16
          via: 192.168.50.4
        - to: 10.200.1.0/24
          via: 192.168.50.5
        - to: 10.200.2.0/24
          via: 192.168.50.6
        - to: 10.200.3.0/24
          via: 192.168.50.7
      nameservers:
        addresses: [{{ router_gateway_ip }}]
The dict for the above template was constructed as follows:
nodes:
  eniac-node1:
    node_info:
      name: eniac-node1
      fqdn: eniac-node1.kubernetes.local
      ip_address: "192.168.50.4"
      pod_subnet: "10.200.0.0/24"
  eniac-node2:
    node_info:
      name: eniac-node2
      fqdn: eniac-node2.kubernetes.local
      ip_address: "192.168.50.5"
      pod_subnet: "10.200.1.0/24"
  eniac-node3:
    node_info:
      name: eniac-node3
      fqdn: eniac-node3.kubernetes.local
      ip_address: "192.168.50.6"
      pod_subnet: "10.200.2.0/24"
  eniac-node4:
    node_info:
      name: eniac-node4
      fqdn: eniac-node4.kubernetes.local
      ip_address: "192.168.50.7"
      pod_subnet: "10.200.3.0/24"

router_gateway_ip: "192.168.50.1"
I created the following mise task to update /etc/hosts and allow connecting to the nodes locally:
[tasks.etc-hosts-set]
description = "Set the hostnames in /etc/hosts"
run = """
sudo sed -E -i '' '/^.*[a-z.-]+kubernetes.local$/d' /etc/hosts
read -r -a NODE_IPS <<< "${HOMELAB_IPS}"
read -r -a NODE_NAMES <<< "${HOMELAB_NODES}"
for i in {0..3}; do
  echo "${NODE_IPS[$i]}\t${NODE_NAMES[$i]}.kubernetes.local" | sudo tee -a /etc/hosts
done
"""
With the following environment variables:
[env]
HOMELAB_NODES = "eniac-node1 eniac-node2 eniac-node3 eniac-node4"
HOMELAB_IPS = "192.168.50.4 192.168.50.5 192.168.50.6 192.168.50.7"
I continued with bootstrapping etcd, the Kubernetes control plane, and worker nodes, setting up everything using Ansible along with a sprinkling of helper mise tasks. I templated things where relevant, adding variables to Ansible’s global_vars to make things more configurable in the future and relying less on static values.
Once I ran through with mise run ansible-playbook-run again, I was able to connect to the control plane from my MacBook Pro as follows:
curl -k --cacert certs/ca.crt https://eniac-node1.kubernetes.local:6443/version
{
  "major": "1",
  "minor": "32",
  "gitVersion": "v1.32.2",
  "gitCommit": "67a30c0adcf52bd3f56ff0893ce19966be12991f",
  "gitTreeState": "clean",
  "buildDate": "2025-02-12T21:19:47Z",
  "goVersion": "go1.23.6",
  "compiler": "gc",
  "platform": "linux/arm64"
}%
kubectl cluster-info --kubeconfig kubeconfig/admin.kubeconfig
Kubernetes control plane is running at https://eniac-node1.kubernetes.local:6443

To further debug and diagnose cluster problems, use 'kubectl cluster-info dump'.
I hit an issue with starting kube-proxy which caused the worker nodes to fail to join the cluster, however, due to a kernel module not being loaded. I added nf_conntrack to /etc/modules-load.d/nf-conntrack.conf and ran sudo modprobe -a nf_conntrack. This allowed the kube-proxy to start.
I also had an issue with the worker nodes connecting to the kube-apiserver. However, this turned out to be a typo with the kubelet configuration.
I finished setting up the worker nodes, and was able to use kubectl to get the node information:
kubectl get nodes --kubeconfig kubeconfig/admin.kubeconfig -o wide
NAME          STATUS   ROLES           AGE   VERSION   INTERNAL-IP    EXTERNAL-IP   OS-IMAGE             KERNEL-VERSION     CONTAINER-RUNTIME
eniac-node1   Ready    control-plane   9h    v1.32.2   192.168.50.4   <none>        Ubuntu 24.04.2 LTS   6.8.0-1020-raspi   containerd://2.0.3
eniac-node2   Ready    worker          9h    v1.32.2   192.168.50.5   <none>        Ubuntu 24.04.2 LTS   6.8.0-1020-raspi   containerd://2.0.3
eniac-node3   Ready    worker          9h    v1.32.2   192.168.50.6   <none>        Ubuntu 24.04.2 LTS   6.8.0-1020-raspi   containerd://2.0.3
eniac-node4   Ready    worker          9h    v1.32.2   192.168.50.7   <none>        Ubuntu 24.04.2 LTS   6.8.0-1020-raspi   containerd://2.0.3
I then created my local kube config file by amending the previous mise task with the following:
[tasks.kubeconfig-local-generate]
description = "Generate the local kubeconfig file"
run = """
  kubectl config set-cluster ${K8S_CLUSTER_NAME} \
    --certificate-authority=certs/ca.crt \
    --embed-certs=true \
    --server=https://${K8S_CONTROL_PLANE_NODE}.kubernetes.local:6443

  kubectl config set-credentials admin \
    --client-certificate=certs/admin.crt \
    --client-key=certs/admin.key

  kubectl config set-context ${K8S_CLUSTER_NAME} \
    --cluster=${K8S_CLUSTER_NAME} \
    --user=admin

  kubectl config use-context ${K8S_CLUSTER_NAME}
"""

[tasks.kubeconfig-generate]
description = "Wrapper task to generate all kubeconfig files"
depends = [
  "kubeconfig-kubelet-generate",
  "kubeconfig-kube-proxy-generate",
  "kubeconfig-kube-controller-manager-generate",
  "kubeconfig-kube-scheduler-generate",
  "kubeconfig-admin-generate",
  "kubeconfig-local-generate"
]
This allowed me to run kubectl commands without referencing the admin configuration directly.
I moved on to setting up the basic Kubernetes configuration for the cluster as follows:
When configuring CoreDNS, there seemed to be some issues with the nodes speaking to one another to resolve DNS. Some investigations highlighted the requirement to load the overlay and br_netfilter kernel modules.
I created a /etc/modules-load.d/containerd.conf file with the modules listed and also ran sudo modprobe -a overlay br_netfilter.
Additionally, I needed to add the following to /etc/sysctl.d/kubernetes.conf and run sudo sysctl --system:
net.ipv4.ip_forward
net.bridge.bridge-nf-call-iptables
net.bridge.bridge-nf-call-ip6tables
The local-path-provisioner and csi-driver-nfs installs went fine, and with some configuration on my NAS allowed me to create Persistent Volumes as sub-directories on a mount on my NAS using the relevant Storage Class.
I noticed an issue when viewing the cluster in Headlamp with a Kubernetes Event for InvalidDiskCapacity being logged for all the nodes on startup with the following detail invalid capacity 0 on image filesystem.
After some investigation, it turned out I needed to also add the vm.overcommit_memory=1 setting to /etc/sysctl.d/kubernetes.conf and run sudo sysctl --system again.
I also needed to append the following to /boot/firmware/cmdlint.txt:
cgroup_enable=cpuset cgroup_enable=memory cgroup_memory=1 swapaccount=1
After a reboot, the message disappeared.
Getting the Metrics Server up and running was a bit of a fiddle. It’s worth making a note of the requirements before starting down this journey. I needed to make a couple of tweaks to the Kubelet and API Server configuration, but the main thing that was required was configuring the aggregation layer. I needed to set up the front proxy certificates and make some changes to the API server service file as follows:
  --requestheader-client-ca-file=/var/lib/kubernetes/ca.crt \
  --requestheader-allowed-names=front-proxy-client \
  --requestheader-extra-headers-prefix=X-Remote-Extra- \
  --requestheader-group-headers=X-Remote-Group \
  --requestheader-username-headers=X-Remote-User \
  --proxy-client-cert-file=/var/lib/kubernetes/front-proxy-client.crt \
  --proxy-client-key-file=/var/lib/kubernetes/front-proxy-client.key \
This allowed Metrics Server to start properly and I was able to run kubectl top nodes and view the node metrics in Headlamp successfully.


The final step was to install Flux to manage the configuration and deployment of applications within my cluster via GitOps moving forward.
I created a gawbul-gitops repository on GitHub and started to build out the configuration using Flux. I installed the following controllers and applications:
I set up cert-manager to use Let’s Encrypt with a ClusterIssuer configuration for the NGINX ingress controller.
I set up the NGINX ingress controller to initially use a NodePort service type, but then went on to install MetalLB. After configuring my router to carve out a small block of IPs and associated IPAddressPool , I switched to the LoadBalancer service type.
I also installed the cert-manager and Flux plugins in Headlamp to make it easier for me to interact with the controllers. However, I often switch back and forth between Headlamp and K9s.
That was the cluster setup how I wanted, ready to work with any applications I wanted to deploy.
The next steps are to set up observability using the following:
I’d also like to test out Grafana Tanka and maybe kro, amongst other things.
I also need to test that the Ansible scripts work for upgrading the cluster, both for renewing the certificates and for upgrading the versions of the software required to run the cluster.
If you have any suggestions on things to try out then feel free to leave a comment. Also, feel free to open issues, start a discussion, or make PRs against my repos if you have any input on the configuration.
I’ll create a follow-up post at some point with the outcome of setting up the observability stack.
In the meantime, I’m over on the Kubernetes Slack workspace as Steve Moss if you want to chat. You can also reach out on Bluesky.